
How To Install Composite Decking
Installing a composite deck transforms your outdoor space into a durable, low-maintenance area perfect for entertaining and relaxation. Unlike traditional timber decking, composite decking combines recycled wood fibres with plastic polymers to create boards that resist rot, insects, and weathering while maintaining natural wood aesthetics.
This comprehensive guide walks you through every step of the composite decking installation process, from initial planning to final finishing touches. Whether you’re replacing an existing deck or creating a new outdoor living space, proper installation ensures your decking project delivers decades of enjoyment with minimal upkeep.
What You Need to Know Before Starting
Composite decking offers superior durability compared to traditional timber decking, combining recycled wood fibres with plastic polymers for enhanced resistance to moisture, insects, and UV damage. The installation process requires basic DIY skills and typically takes 1-3 days, depending on your deck size and complexity.
Before beginning your decking project, allow composite boards to acclimate outdoors for 72 hours. This acclimation period prevents warping and ensures proper fitting during installation, as composite materials respond differently to temperature and humidity changes than natural wood.
Essential tools include a drill with various bits, a spirit level, a circular saw with a fine-tooth blade, a tape measure, a chalk line, and protective equipment, including safety goggles and protective gloves. You’ll also need a rubber mallet for gentle board adjustment and pre-drill pilot holes to prevent material splitting.
Consider investing in high-quality options like lifetime composite decking for maximum longevity and performance. Premium composite material offers enhanced durability and often includes comprehensive warranties covering both materials and performance.
The composite decking installation process requires attention to structural integrity throughout each stage. Unlike laying composite decking on a flat surface, proper installation demands a well-constructed decking frame with adequate drainage and support.
Planning Your Composite Deck Installation
Successful composite decking installation begins with precise measurement and careful planning. Measure your decking area accurately using a tape measure, then add 10% extra materials to account for cuts, wastage, and potential mistakes. This additional material ensures you won’t face delays if boards arrive damaged or measurements require adjustment.
Design your decking layout to minimise board cutting and ensure efficient material use. Plan the positioning of deck boards to avoid narrow strips at edges, which can look unprofessional and create structural weak points. Consider how your next board will align with existing structures like house walls or garden features.
Position your raised deck at least 150mm below the damp-proof course with a 1:100 fall away from your house. This slope ensures proper drainage and prevents water accumulation against building foundations. The fall should be consistent across the entire decking area to avoid water pooling.
Check local building regulations before starting construction, as some areas require planning permission for raised decks or structures exceeding certain dimensions. Contact your local authority to confirm requirements and obtain necessary approvals before beginning work.
Order all materials, including composite boards, treated timber for the timber frame, galvanised fixings, weed membrane, and drainage materials. Ensure boards arrive at least three days before installation to allow proper acclimation. Cover materials with a ground sheet to protect them from the weather while maintaining air circulation.
Preparing Ground for Decking
Mark out your decking area using wooden pegs and builder’s line for accuracy. This initial marking ensures your finished deck aligns correctly with existing structures and property boundaries. Use a tape measure to verify all measurements match your planned dimensions.
Remove existing turf and excavate soil to 50mm across the entire area. This excavation creates space for drainage materials and prevents vegetation growth beneath your deck. Ensure excavation extends slightly beyond your planned deck perimeter to accommodate the decking frame.
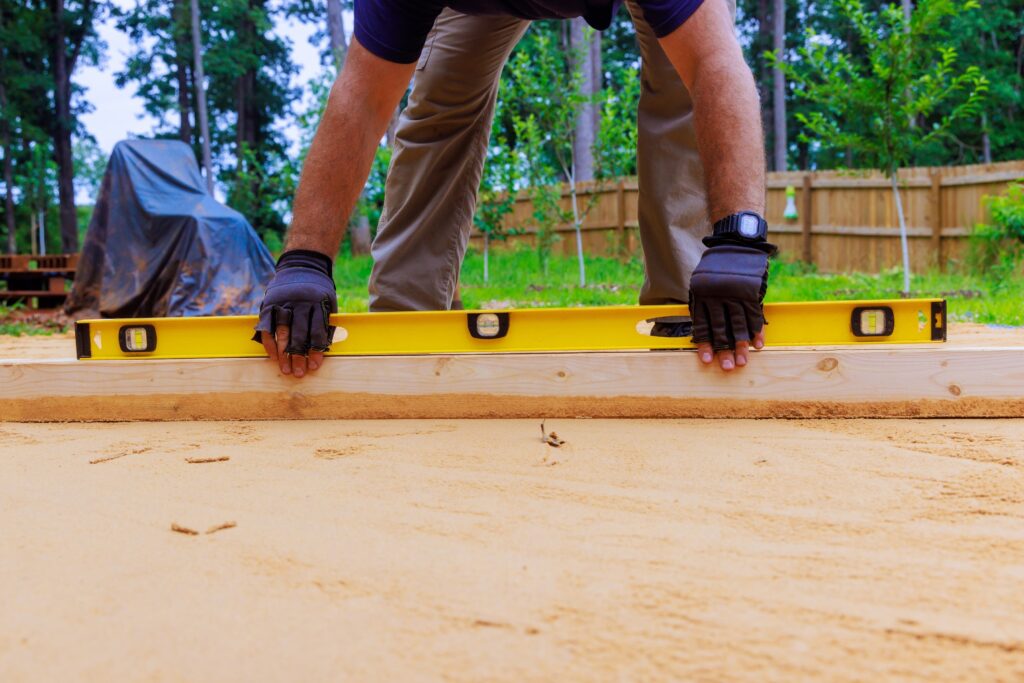
Create clean, straight edges using a sharp spade and ensure the ground is level using a spirit level. Check levels across the entire area, as uneven ground can compromise your decking subframe stability. Address any significant level variations before proceeding with construction.
Install weed control fabric across the entire area and secure with landscape pins every 500mm. This fabric prevents vegetation growth while allowing water drainage. Overlap fabric edges by 100mm and ensure complete coverage to maintain effectiveness.
Add a 25mm layer of sharp sand or pea gravel for drainage and stability. This layer provides a stable base for support pads while allowing water to drain away from the decking subframe. Level the aggregate using a rake and check with a straight edge.
Position concrete paving slabs at 500mm intervals to support frame joists. These pads distribute load across soft ground and prevent the timber frame from settling unevenly. Adjust pad height using additional aggregate to ensure all supports are level.
Build Frame for Decking
Cut treated timber joists to the required lengths using a circular saw or mitre saw. Measure twice and cut once to avoid waste and ensure accurate dimensions. Sand cut ends smooth to prevent splinter damage during handling and to ensure clean joints.
Create a rectangular frame using 150mm galvanised screws at each corner joint. Pre-drill holes to prevent timber splitting and ensure screws drive cleanly. Use a drill with appropriate bits to create pilot holes slightly smaller than the screw diameter.
Ensure your frame is perfectly square by measuring diagonals – both measurements should be identical. This check is crucial because any irregularity in the decking frame will affect board alignment and create installation difficulties. Adjust corner positions until measurements match exactly.
Join frame sections with 600mm timber plates for decks longer than the single joist length. These plates create strong connections between frame sections and maintain structural integrity across the entire deck. Secure plates with multiple screws for maximum strength.
Position the frame on your prepared base and check levels using a long spirit level. The frame must be perfectly level before installing internal joists, as any irregularities will affect the final board installation. Make adjustments using additional paving slabs or adjustment wedges.
Verify the frame sits securely on all support points without rocking or movement. A stable decking subframe is essential for long-term performance and prevents board separation or squeaking during use.
Installing Internal Joists
Space internal joists at 300mm centres for standard composite decking boards. This spacing provides adequate support while matching most hidden fastener system requirements. Mark joist positions on frame rails using a pencil and tape measure, ensuring consistent spacing across the entire frame.
Mark joist positions precisely, as any variation will affect fastener alignment and board installation. Use a chalk line to mark positions across long frame sections for accuracy. Double-check all measurements before cutting or installing any components.
Install galvanised joist hangers using 30mm screws for secure attachment. These metal brackets provide superior support compared to traditional nailing methods and ensure correct joist centres throughout the frame. Position hangers carefully to maintain consistent spacing.
Cut internal joists to fit snugly between frame rails without forcing. Joists should slide easily into hangers while maintaining contact with both sides. Sand ends if necessary to achieve a proper fit without gaps that could compromise structural integrity.
Insert joists into hangers, ensuring tops are flush with the frame. This alignment is critical for proper board installation and prevents high or low spots that could affect the final appearance. Check alignment using a straight edge across multiple joists.
Secure each joist with 100mm timber screws driven at a slight angle for maximum holding power. Drive screws through pre-drilled holes to prevent timber splitting and ensure secure attachment. Check each connection for tightness before proceeding.
Double-check all joists are level and properly aligned before proceeding with installation. Use a spirit level across multiple joists to verify consistent height and alignment. Address any irregularities before installing decking boards, as corrections become difficult once boards are in place.
Fix Noggins Between Joists
Cut noggins from the same treated timber used for frame construction to ensure consistent moisture content and dimensional stability. Noggins provide lateral support and prevent joist movement under load, contributing to overall frame rigidity and performance.
Position noggins to ensure no gap between supports exceeds 1200mm. This spacing prevents excessive joist deflection and maintains structural integrity across the entire frame. Plan noggin locations to avoid interference with hidden fastener installation.
Stagger the noggin positions to avoid interference when drilling pilot holes and driving fixings. Alternating noggin heights between adjacent joist bays provides easier access for installation while maintaining structural support throughout the frame.
Drill pilot holes 40mm from the top and bottom of each noggin to prevent timber splitting during screw installation. Use appropriate drill bits sized for your chosen fixings and ensure holes are aligned to prevent noggin splitting.
Secure noggins with 100mm galvanised screws driven into joist sides at predetermined positions. Drive screws firmly but avoid over-tightening, which can split the timber or pull screw heads below the surface. Check connections for secure attachment.
Verify frame rigidity by walking carefully on the completed structure – no flexing should occur under normal loading. Any excessive movement indicates inadequate support or loose connections requiring attention before proceeding with board installation.
Installing the First Composite Board
Position starter clips along the outer edge if no board overhang is required for your decking layout. These clips provide the anchor point for your first decking board and ensure proper alignment for all subsequent boards. Secure clips at correct joist centres according to manufacturer specifications.
Allow a maximum of 25mm overhang if covering the frame completely for a seamless appearance. This overhang conceals the frame edges while providing a clean, finished look. Ensure overhang is consistent along the entire first board length.
Drill pilot holes 30mm from board edges to prevent splitting when driving screws. Composite material requires careful handling to avoid damage during installation. Use drill bits 2mm wider than the screw shank width as specified in the detailed instructions.
Fix the first board using colour-matched composite deck screws for a professional finish. Drive screws carefully to avoid over-driving, which can damage the composite material permanently. Countersink screws slightly below the surface for a clean appearance.
Ensure the first decking board is perfectly straight using a chalk line as a guide. The alignment of your first board determines the alignment of all subsequent boards, making accuracy critical at this stage. Take time to achieve perfect positioning before securing.
Leave 6mm expansion gaps at each end as per the manufacturer’s specifications. These gaps accommodate thermal expansion and prevent buckling during temperature changes. Consistent gap spacing ensures professional appearance and long-term performance.
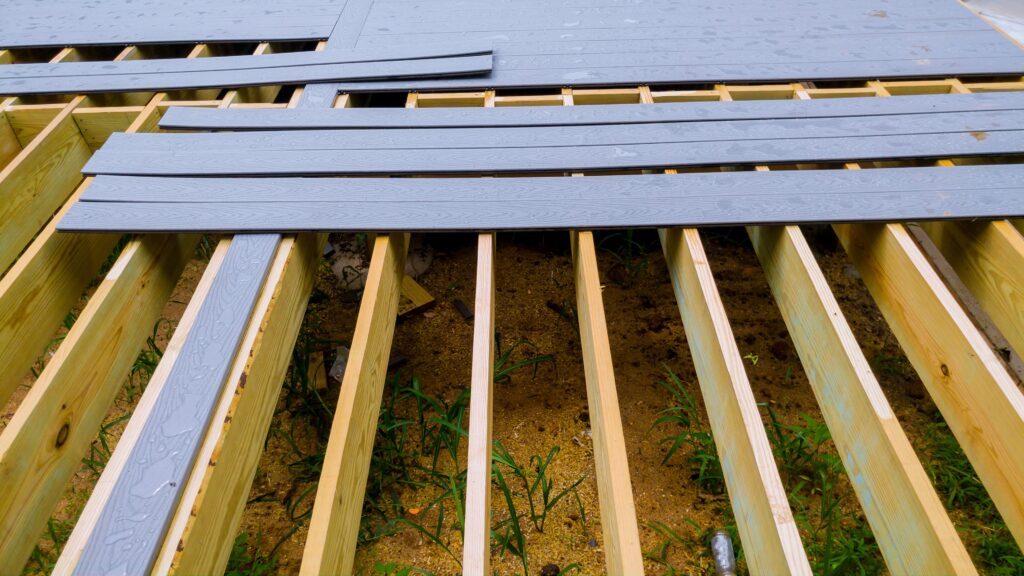
Laying Remaining Composite Boards
Insert hidden fastener clips into the grooves of the installed board at each joist location. These clips create the connection points for your next board while maintaining the hidden fastener system’s clean appearance. Ensure clips align perfectly with joist centres.
Position the next board and slide into clips, maintaining 6mm expansion gaps at all ends. The board should slide smoothly onto fastener clips without forcing. Gentle pressure may be required to fully seat the board onto all clips.
Tap composite boards gently with a rubber mallet if needed to close gaps properly between boards. Use light taps to avoid damaging the board surface or edges. Work along the board length to ensure consistent seating on all fasteners.
Continue laying composite decking boards, working systematically across the deck area. Maintain consistent technique for each board installation to ensure uniform appearance and proper fastener engagement. Check alignment regularly using a straight edge.
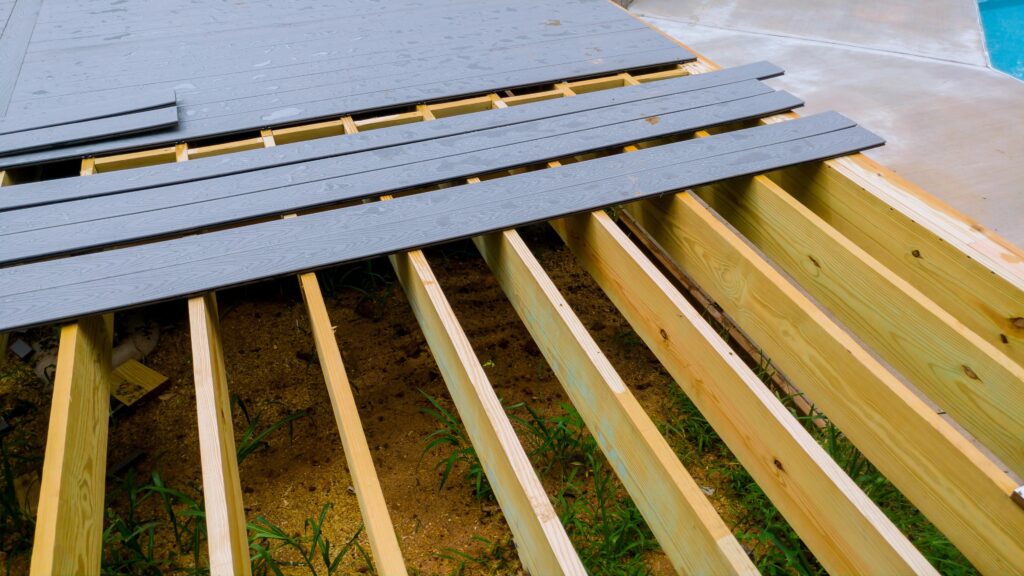
Cut the final board to width using a circular saw with a fine-tooth blade designed for composite material. Measure carefully and cut slowly to achieve clean edges without chipping. Support the board properly during cutting to prevent binding or damage.
Install end caps or fascia boards to cover the frame and create a finished appearance. These trim pieces provide weather protection for frame edges while creating a professional look. Secure trim with appropriate fixings at recommended spacing.
Creating Proper Butt Joints
Plan butt joints to occur at doubled joist positions for adequate support beneath board connections. This planning ensures structural integrity at joint locations and prevents board sagging or movement over time. Mark doubled joist locations during frame construction.
Install additional joist timber beneath joint areas before fixing composite boards to provide adequate support for both board ends. This doubled support prevents flexing at joints and maintains structural integrity under load.
Maintain 10-25mm drainage gaps between supporting joists at butt joint locations. This gap allows water drainage and prevents moisture accumulation that could affect the decking subframe. Ensure gaps are consistent with overall drainage planning.
Use four fastening clips total – two at each board end – for secure attachment without over-constraining the joint. This fastening pattern allows for thermal movement while maintaining secure attachment. Position clips close to board edges for maximum support.
Position fastener clips close to board edges for a professional appearance and optimal load transfer. Consistent clip positioning ensures uniform appearance across all butt joints while maintaining structural performance requirements.
Allow standard expansion gaps at all butt joint locations to accommodate thermal movement. These gaps prevent buckling during temperature changes and maintain the deck’s structural integrity throughout seasonal variations.
Adding Fascia Boards and Finishing Touches
Measure and cut fascia boards to cover frame edges completely, creating a clean transition between deck and surroundings. Fascia boards protect the frame timber from weather exposure while providing a finished appearance. Use the same composite material for consistency.
Drill pilot holes and secure fascia boards with composite decking screws at 300mm centres. Pre-drilling prevents material splitting and ensures secure attachment. Use colour-matched screws for a professional appearance.
Leave ventilation gaps as specified by manufacturer guidelines to maintain airflow beneath the deck structure. These gaps prevent moisture accumulation while allowing the decking subframe to dry properly after rain or cleaning.
Install corner trim and end caps for a professional finish that conceals all frame edges and cut board ends. These finishing components protect vulnerable areas from the weather while creating a seamless appearance that enhances your outdoor space.
Check all fixings are tight and properly seated throughout the entire deck structure. Walk across the completed deck, checking for any loose boards or squeaks that indicate loose connections requiring attention.
Clean the surface with mild detergent and water to remove installation debris and prepare the deck for use. Use a soft brush to avoid scratching the surface and rinse thoroughly with clean water.
Common Installation Mistakes to Avoid
Insufficient board spacing leads to expansion problems and warping as the composite material responds to temperature changes. Always maintain manufacturer-specified gaps between boards and at the deck perimeter to accommodate thermal movement.
Over-tightening screws damages composite material permanently and can cause stress concentrations leading to cracking. Drive screws carefully and stop when heads are flush or slightly countersunk below the surface.
Poor drainage planning results in water pooling and frame deterioration over time. Ensure proper fall away from buildings and adequate clearance beneath the deck for air circulation and drainage.
Inadequate frame support causes deck movement and board separation during use. Follow spacing specifications for joists and provide adequate support at all board connections, particularly butt joints.
Ignoring manufacturer guidelines for specific composite decking products can void warranties and compromise performance. Each manufacturer has specific requirements for installation, spacing, and fastening that must be followed.
Skipping the acclimatisation period leads to unexpected board movement after installation. Allow boards to adjust to site conditions for the minimum specified time before beginning installation work.
Post-Installation Care and Maintenance
Sweep your deck regularly to remove leaves and debris buildup that can retain moisture and cause staining. Regular cleaning prevents debris accumulation that could affect the deck’s appearance or performance over time.
Clean with warm soapy water and a soft brush every 3-6 months to maintain appearance and remove surface contamination. Avoid harsh chemicals or abrasive cleaning methods that could damage the composite material surface.
Inspect fixings annually and tighten any that have loosened due to thermal cycling or settling. Check for any signs of movement or separation that might indicate structural issues requiring attention.
Remove snow with a plastic shovel to avoid surface damage – avoid using salt, which can damage composite boards and accelerate fastener corrosion. Use appropriate snow removal techniques that won’t scratch or gouge the deck surface.
Address stains immediately to prevent permanent discolouration of the composite material. Most stains can be removed with appropriate cleaning products, but prompt attention prevents deep penetration.
Expect minimal maintenance compared to traditional timber decking, as composite decking requires no staining, sealing, or regular treatment. This low-maintenance requirement makes composite decking an excellent long-term investment for your outdoor space.
Your completed composite decking installation provides years of enjoyment with minimal upkeep, transforming your outdoor space into a durable, attractive area perfect for entertaining and relaxation.
Summary
Installing composite decking is a highly rewarding project that can transform your outdoor space into a durable, low-maintenance, and visually appealing area. The process involves careful planning, precise measurement, and proper preparation of the ground and decking frame to ensure structural integrity and long-lasting performance. By allowing composite boards to acclimate before installation and following recommended spacing and fastening techniques, you can avoid common pitfalls such as warping, cracking, or uneven surfaces.
This guide has covered every essential step, from preparing the base and building a sturdy timber frame with correctly spaced joists to laying the composite decking boards using hidden fasteners or screws for a clean, professional finish. Attention to detail during installation, including proper drainage, expansion gaps, and secure fixing of fascia boards and trims, ensures your deck remains stable and attractive for years. With minimal maintenance required compared to traditional timber decking, composite decking offers a practical and stylish solution for enhancing your outdoor living space.
Frequently Asked Questions
In many areas, raised decks or those exceeding certain sizes require approval. Check local building regulations and obtain any necessary permits before you start.
A drill, circular saw with a fine-tooth blade, spirit level, tape measure, chalk line, rubber mallet, PPE, galvanised screws, joist hangers, weed membrane, aggregate, paving slabs, treated timber for the frame, and composite boards/fasteners.
Most DIY installs take 1–3 days, depending on size and complexity. Basic carpentry skills and careful planning are sufficient for a competent DIYer.
Mark out the area, remove turf, excavate about 50mm, lay weed membrane, add a 25mm layer of sharp sand or pea gravel, and set level paving slabs at roughly 500mm centres for frame support.
Build a square, level frame and space internal joists at 300mm centres (unless your board brand specifies otherwise). Add noggins so no unsupported span exceeds 1200mm and ensure good drainage and ventilation beneath.
Yes acclimate boards outdoors for 72 hours, and leave manufacturer-specified gaps (typically 6mm at board ends and edges) to allow for thermal movement.
Use starter clips for the first board, hidden clips in the grooves at each joist for subsequent boards, or colour-matched composite screws if the system allows. Avoid over-tightening and keep the first board perfectly straight.
Place butt joints over doubled joists, allow expansion gaps, and use two clips per board end (four per joint). Finish with fascia/end caps, maintain ventilation gaps, and clean the deck after installation.
